If you're into face painting, you know nothing takes your designs to the next level like a little sparkle. Whether it’s for kids' parties, festivals, or unicorn-themed everything, face paint bling is the perfect finishing touch.
Want to learn how to make face paint bling at home? Good news—it’s easier than you think, and you don’t need any fancy equipment. Just a few affordable supplies, a little time, and a sprinkle of creativity!
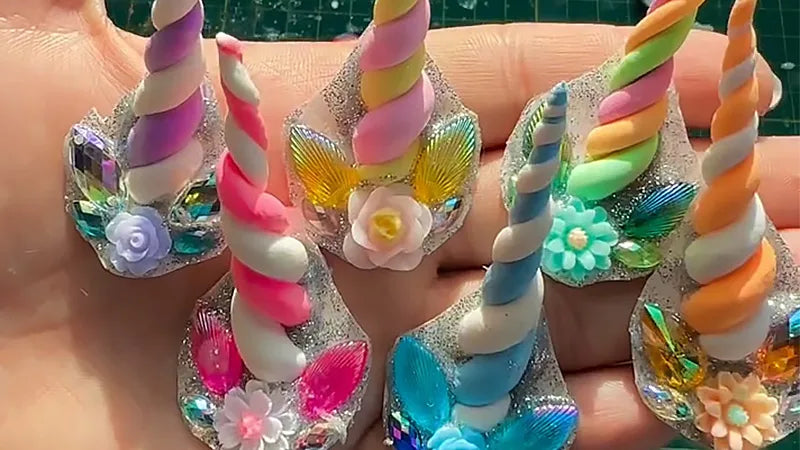
In this tutorial, we’ll walk you through how to make your own face painting jewels, bling clusters, and even unicorn horn gems using simple materials.
✨ What You'll Need:
- Medical tape
- Glitter paint
- Non-toxic modeling clay
- Rhinestones or flat-back gems
- Wax pencil for rhinestones (or tweezers)
🦄 Step-by-Step: How to Make Face Paint Bling Clusters
Step 1: Sculpt Your Unicorn Horn
Start with a small piece of non-toxic modeling clay. Roll it into two tiny balls, then shape each one into a sausage (yep, we said sausage!).

Twist the two pieces together until you get that perfect spiral shape of a unicorn horn. Smooth it out as needed.

Step 2: Let It Dry
Once you’re happy with the shape, trim any extra clay from the base and let your horn air-dry.
Pro Tip: Make a bunch at once so you’re stocked up for your next face painting gig.

Step 3: Flatten the Base
When your unicorn horn is dry, trim the bottom again to make it flat. This helps it stick better to your tape later on.

Step 4: Prep the Tape
Cut a piece of medical tape to your desired size—this will be the base of your bling face painting cluster.
Step 5: Add Glitter Paint
Apply a thin, even layer of glitter paint over the tape. Don’t go too heavy—it should be sparkly.

Step 6: Attach the Unicorn Horn
Dab some glitter paint on the base of your unicorn horn and press it firmly into the center of your tape.

Step 7: Add the Gems
Using a wax pencil for rhinestones (or tweezers), pick up your favorite face paint gems and start decorating around the horn. Create a balanced shape like a crown, heart, or flower—there are no rules here!

This is where you can get really creative. Combine colors, use iridescent rhinestones, or go for an all-pastel vibe. Just make sure the gem face paint design is symmetrical and fits the shape of the tape.
Step 8: Let It Dry
Set your face paint bling clusters aside and let them dry completely—usually a few hours is enough. You want everything stuck firmly before the final step.
Step 9: Cut It Out
Once dry, cut around the gem clusters neatly, staying close to the edge of the gems. And voilà—you’ve made your own DIY face painting jewels!

💡 Bonus Tips:
Store finished clusters in a flat box or folder to keep them safe.
Want to speed things up? Use a hot glue gun for faster drying (but be careful with the heat and children).
Try using face painting bling templates for easy symmetry.
Whether you’re adding sparkle to princess cheeks or creating dazzling designs for festivals, these DIY crystal face paint gems will be your new favorite add-on. They’re fun, reusable, and a total showstopper.
So next time you’re wondering where to buy face paint sponges or how to make unicorn bling for face painting, remember—you can totally make it yourself!
Ready to give it a go? Tag us on Instagram @Bowitzki with your creations and let the sparkle fly ✨
Have questions or tips of your own? Drop them in the comments—we’d love to hear from you!