Hi friends! Today I’m sharing one of my absolute favorite clown face painting designs. It’s simple, dramatic, and works great for Halloween, costume parties, or anytime you want to turn heads with a bold look. The best part? You only need three colors!
Step 1: Start with the White Base
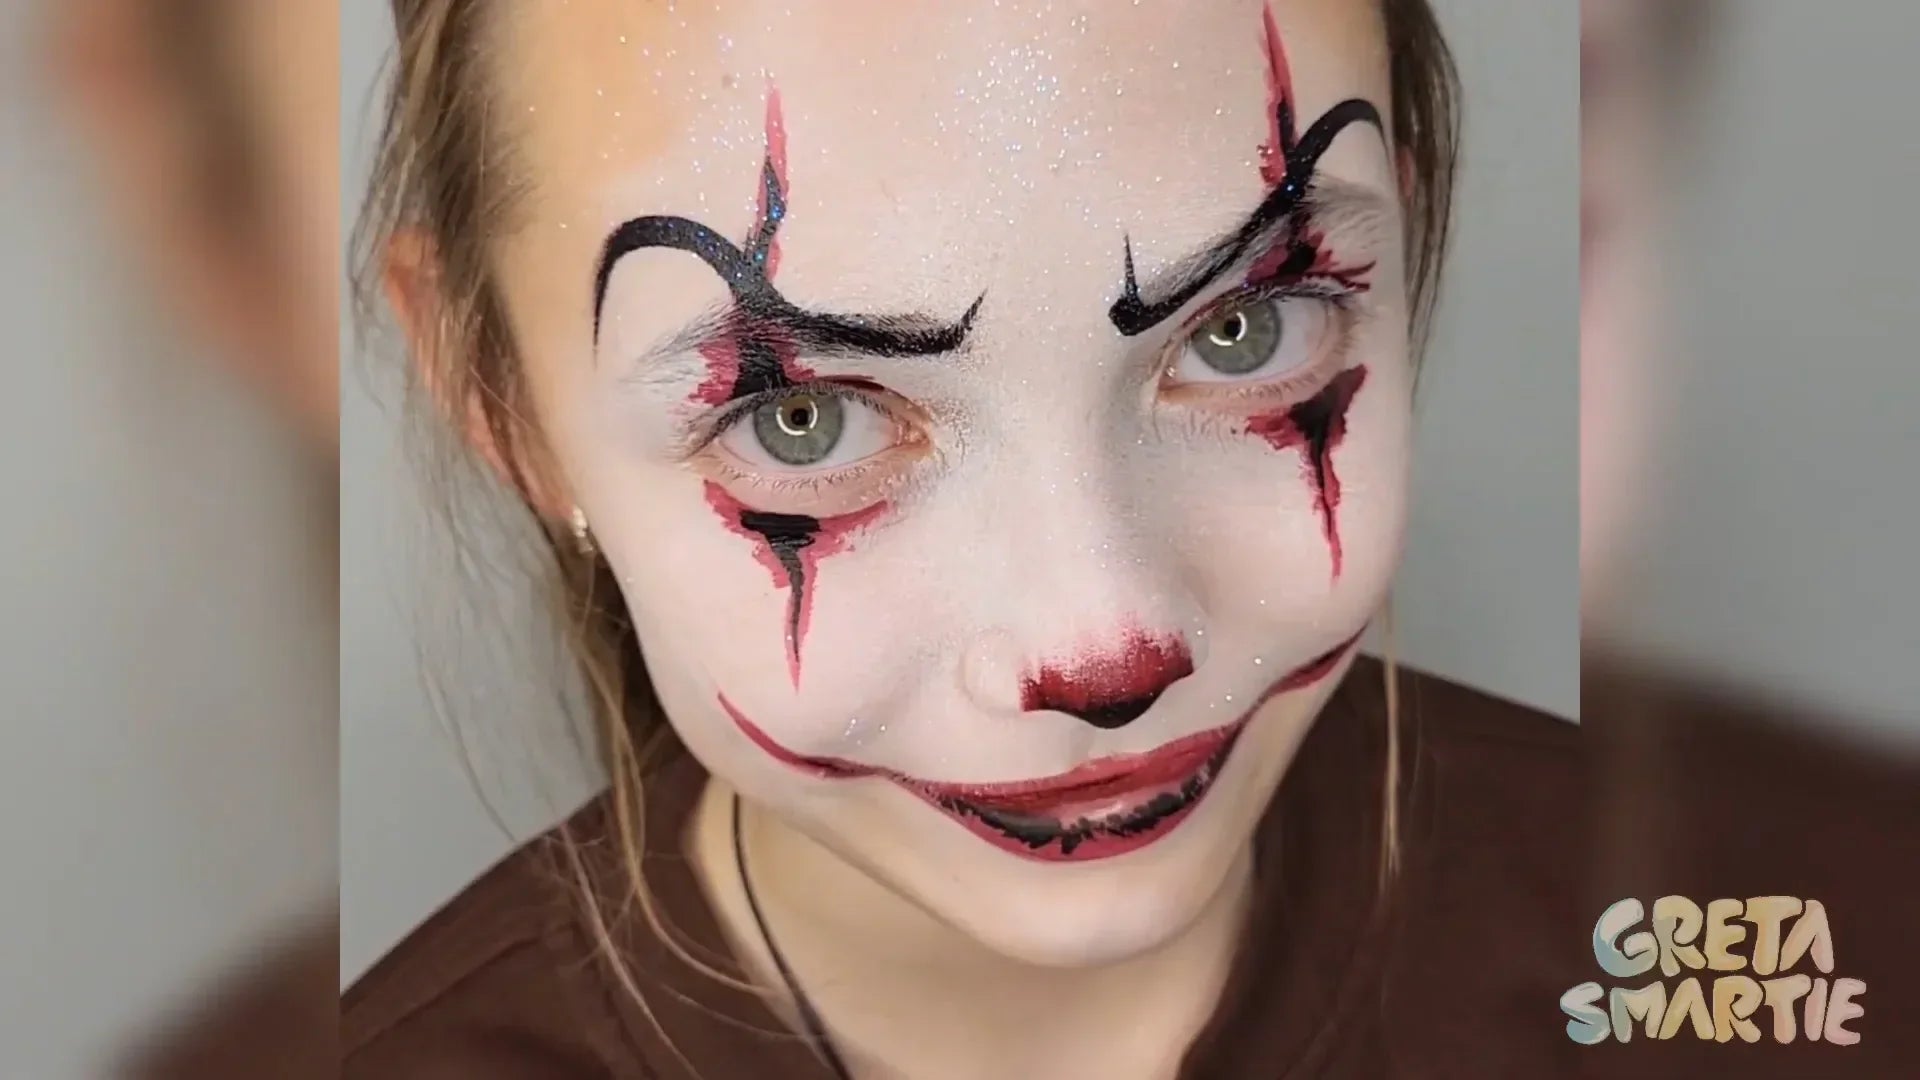
For this clown face painting, I always start with white face paint as the base. I love a solid, light coverage that still feels soft on the skin. I use a water spray bottle to lightly mist the paint and my sponge. Then I swirl the sponge around to pick up the product—just enough to cover the whole face.

I begin in the center and use a dabbing motion to apply the paint evenly. The sponge blends out the edges beautifully, pushing the color outward without leaving harsh lines. It’s super soft, holds plenty of paint, and is gentle enough for kids' skin too. If you want an even whiter finish, just layer it up!
Step 2: Add a Pop of Red
Next comes the red—my go-to is a rich blood-red shade. It’s bold, intense, and gives this design a spooky twist. I start by painting the eyes. Don’t worry about making them perfect! I like to draw slightly wiggly lines around the eyes with a light hand. No pressure, just let the brush glide.

This isn’t your average circus clown design with perfect symmetry and crisp shapes. I want something a bit more... elegant. Think Halloween clown with a dramatic flair!
Step 3: Lips and Nose
For the nose, I paint the tip and nostrils, blending the color upward. Then I overline the lips just slightly. You could totally use a bigger brush to go faster, but I stick with a small one for better control—especially around the mouth.

If you want to change up the vibe, feel free to swap red for other fun colors like green, pink, or even blue. Each version gives a totally different mood!
Step 4: Add Drama with Black Details
Now it’s time to add some drama! Using black face paint, I create soft shadows and lowlights right in the center of the red areas—around the eyes, lips, and nose. This instantly adds depth and gives the clown a more artistic, edgy look. It’s wild how this one design can look totally different on every face!

Step 5: Big Brows, Big Personality
Almost done! To finish the look, I paint big expressive eyebrows. Honestly, while I thought they matched when I painted them, watching back, I noticed they turned out a bit different. But hey—don’t we all have one “good” eyebrow and one that does its own thing?

Optional: Add Some Sparkle
Want to make your clown face painting extra fun? Add a bit of glitter! I like using a glitter spray or dust to add sparkle on the cheeks, brows, or wherever you want a magical touch. It’s optional—but highly recommended!

And there you have it—my favorite clown face painting design, perfect for Halloween or whenever you’re in the mood to stand out. It’s bold, easy to do, and totally customizable.
What do you think? Do you have a favorite clown design yet? Try this one and let your creativity shine.
Happy Halloween and happy painting!