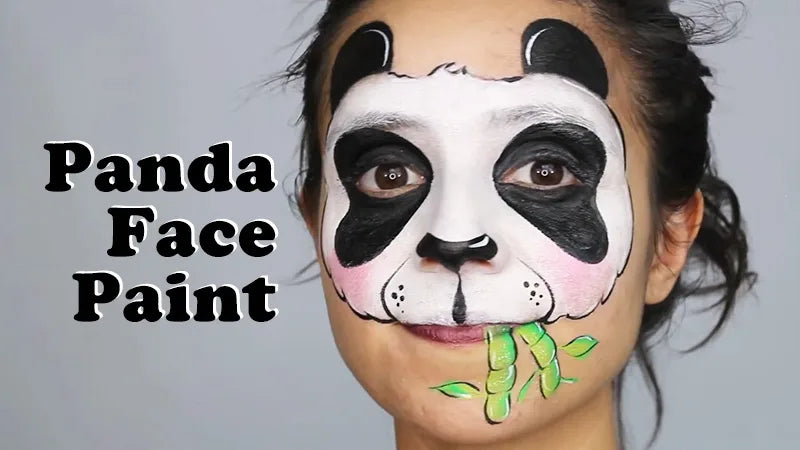
Looking for a cute and eye-catching face painting idea? A realistic panda face paint design is always a winner—especially with kids who love these lovable black-and-white bears. In this step-by-step tutorial, we’ll show you how to create a more realistic panda face paint look that’s perfect for festivals, parties, and face painting events. Just keep in mind: while panda designs may look simple, they do take a bit more time due to the need for strong, defined color application. So save this design for moments when you’re not rushed—it's not ideal for the end of the line!
Step 1: Base Coat with White
Start by sponging the entire face with a mix of regular white and pearl white face paint. The combination gives a soft shimmer while helping to achieve a smooth and even base. Because the majority of the panda’s face is white, you may need a few layers to reach the desired opacity. Make sure the white is well blended and even.

Step 2: Define the Shape
Use a damp cloth or wipe to clean the edges of your design. This helps define the panda face shape and makes your design look clean and polished.

Step 3: Add the Panda Ears
Using a fresh sponge and black face paint, dab in two semicircle ears at the top of the forehead.
Then, outline and fill in the ears with a number 4 round brush to deepen the black and give the ears a more defined, realistic shape.

Step 4: Add Blush for a Girl Panda
If you’re painting a girl panda, add a soft blush using pink paint. Apply it gently to the cheeks, and don’t forget to sprinkle some pink glitter on top for that extra sparkle.

Step 5: Eye Area
Next, use a black sponge to carefully dab the eyelids. This eliminates the need to paint directly on the lids, which can be uncomfortable. It also adds depth to the eyes.

Step 6: Outline the Eyes
With your number 4 brush, outline the top of each eyelid and paint a black oval just beneath each eye. Fill in each oval completely using either the same brush or a filbert brush. Be sure to keep the eye shape realistic—avoid extending the ovals below the nose level for the most natural effect.

Step 7: Draw the Nose and Muzzle
Use a number 4 brush to paint a slightly thick, rounded nose—remember, pandas have larger noses. With a number 1 brush, paint a backward teardrop shape starting from under the nose and leading down to the upper lip.

Then, using the same brush, draw thin lines for the muzzle from the corners of the lips up to the nose. Load a number 2 brush with black paint to create small dot accents inside the muzzle area.

Step 8: Fuzzy Panda Edges
Outline the panda’s face with fuzzy strokes to mimic soft fur. Focus on the cheeks and forehead—skip the eye area to keep it clean and sharp.

Step 9: Optional Bamboo Detail
If you have a few extra minutes, add a touch of nature!
Use a green rainbow cake with a small flat brush to paint bamboo sticks below the mouth.
Paint three green lines per stick, and add simple leaves.

For extra detail, mix black and brown with a number 1 brush and outline the bamboo using a number 12 long shaper brush.

Step 10: Add Highlights
To make your panda pop, use white paint to highlight key areas—around the eyes, on the nose, and along the cheeks. This final touch adds depth and brings the whole design to life.

Final Thoughts
That’s it! Your adorable and realistic panda face paint is complete. Whether you’re painting at a festival, a birthday party, or a community event, this panda design is sure to be a favorite. For best results, always use high-quality face paints and brushes—like the ones from Bowitzki—to achieve smooth, bold lines and vibrant colors.
Want more face painting tutorials and inspiration? Browse our blog for creative ideas, product tips, and more!